


Monday, January 30, 2012
I spent the weekend helping a friend build a new pole barn for all of the equipment he has. Tractors, boats and associated pieces. I love doing this type of work and look forward to it. But, because of my bad knee, I don't do as much of it as I would like.
The card that I am posting today is a card that I made Friday. For this card I used a stamp set from "Close to My Heart" and it is called "The Present" # D1436 and sells for $17.95. Very cute set and I use it quite often. Here is the card;
"The Present"
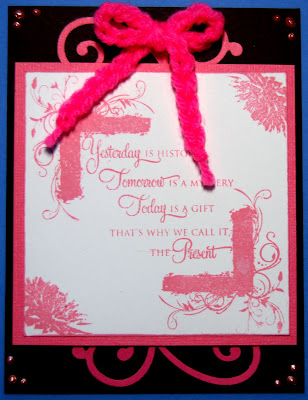
The image on the card uses three images from the set and the images are stamped using the "Blush" ink pad from "Close to My Heart". This ink give a very pale, but pretty color.
I used a Quik-Kutz die to cut out the swirls on the top and bottom of the card on a matching pink card stock. I then added the "Liquid Pearl" dots to the corners of the card.
I used a Quik-Kutz die to cut out the swirls on the top and bottom of the card on a matching pink card stock. I then added the "Liquid Pearl" dots to the corners of the card.
My wife made the crocheted bow for the top of the card. She is very handy at doing these kind of handcraft items.
Hope you enjoy my efforts and will leave a comment.
Have a GREAT DAY!!!
Bob L.
5
comments
 I used this on in a card class that we had last week. Here is what the card looks like when it is opended. Count the folds to see where it gets it's name
